

Good morning
I left off needing to find a lock that would work for this cabinet. After a lot of searching the web and inquiring about custom locks I decided to order a couple. I was not impressed...at all, even the nicer locks were just too bulky and designed more for a box style install, and frankly still had a cheap look and feel. I am happy though that I went through this process, in the end I decided to design and build a lock myself. I wanted something simple and if I could get away with it, something clever that would not have a key hole. So, when the build comes to an end I'll post on how the lock works but it is basically a stainless steel rod that drops down from the top inclosed in a brass sleeve....and no key holes!!
With that decided, I set up a couple jigs on the drill press and got to work milling the brass sleeve to house the stainless steel piston.

After all the door stop mortises were chiseled and the lock mounted, I was able to finally start the glue up. But first it was time see this Kao come to life and apply some tung oil!

The first step in the glue up was to put the boxwood panels inside the top and bottom to allow for clearance from the door stops when the drawers are opened and closed.

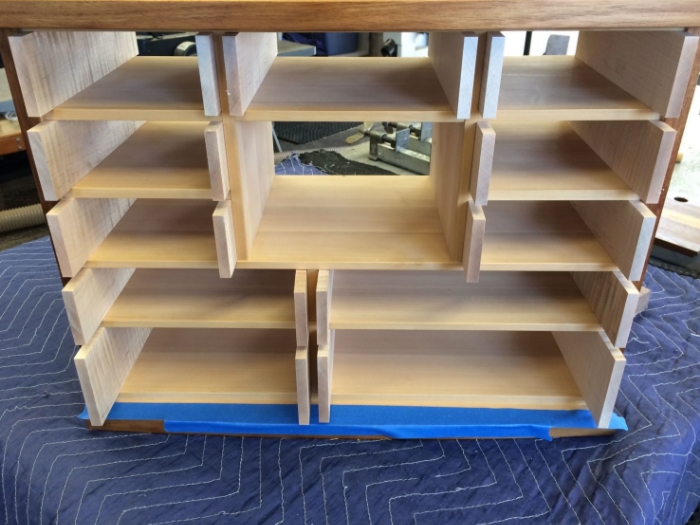
After gluing the carcass was complete, I was able to begin each one of glue ups for the partitions.

As for the drawers they started off with the fitting of each side to each individual pocket. I chose clean, straight grain curly maple. When choosing drawer sides I like to pick a wood that I know will hand plane easily, this helps when fitting each completed drawer to their pocket.
With all the drawer sides fit it was finally on to choosing a dovetail layout, milling up the drawer fronts and chopping some pins and tails! A lot of pins and tails!! Still doing that in fact.....

Cheers!